I love flexible fashion designs!
It’s moody, practical, versatile, and sustainable. But style is style, and if you can’t find interchangeable looks that you like here at Effy By Design, I tried to sum up basic information and advises to help you design and create your own! Following the article on two-sides reversible, in this article I’ll go over one of the most versatile technique of flexible fashion designs: removable & inter-changeable.
(Disclosure: external links to other brands are marked *, but myself (Effy H) or Effy By Design does not have any relation with any of them, these are not sponsored links, but genuine recommendation for inspiration and examples! 🙂 )
Removable & Inter-changeable Scorecard
Potential
- All projects
- Endless looks
- Modify color, texture & shape
- Quick to change, without taking clothe off
Crafting
- Relatively easy
- Few structural constraints
- Some design skills required
Sustainability
- Can extend clothing lifespan almost endlessly with minimal material consumption
Introducing: Removable & Inter-changeable clothing
When I was a kid, I used to have a coat with a hat your could snap on and off… it was very practical, you could snap it on when it rained, and snap it off when clouds cleared out. And let’s face it, it was just really fun to play with. In essence, that’s what removable and inter-changeable techniques can bring to your designs: practicality & fun.
It consists in creating clothing or accessories from which, or on which, you can attach or detach elements as you wish. In fact, almost every project can integrate some detachable and inter-changeable elements. And the good part of this techniques is that it doesn’t have to be very complex (though it could be), so it is beginners friendly.
So today I’ll try to cover all you need to create your own flexible clothing design.
Where to start?
The first question is obviously to figure out what to remove / change, and the impact on your core pattern. Then you will need to ask yourself how you plan to store the removable portion. Next you will need to choose the best method to attach and detach the removable parts. And finally, you’re all set, time to create your baby!
What parts to remove?
When you think about removable clothing, you can basically separate into three categories, based on how structural is the part you want to remove from your basic pattern. The more structural, the more complex the design will be.
Simple -> Add / remove parts that are completely independent.
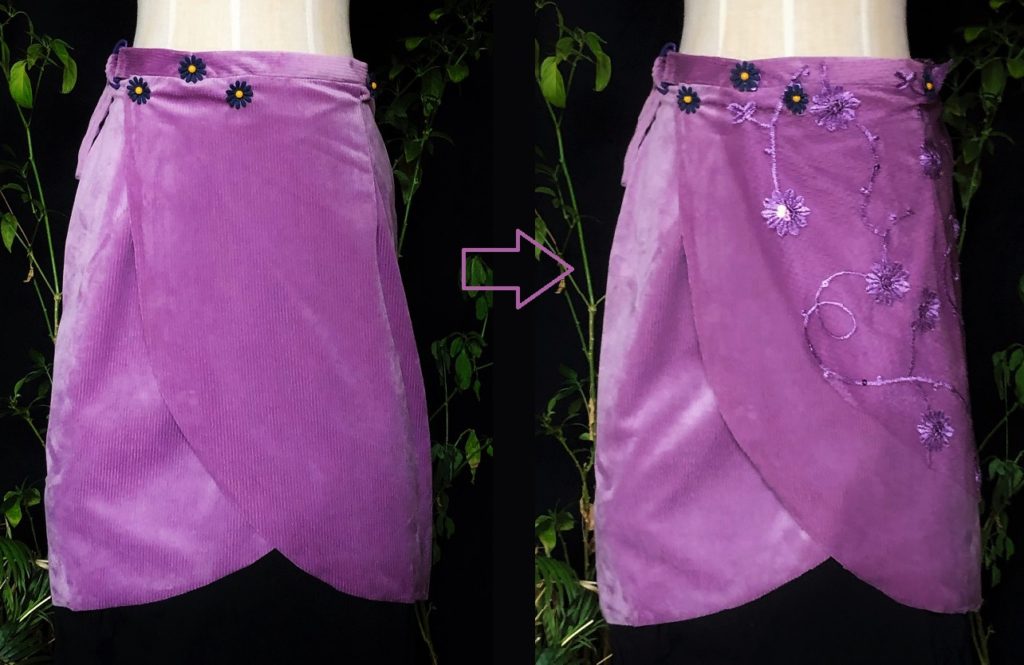
They generally are cosmetic elements that come on top of the basic project, and does not affect your basic pattern. Think emblems that you can scratch on top of working uniforms. Think napkins that are snapped to a baby bodysuit. Think bows you can add and remove like Leslie Dash’ Dress For Cocktails* products. Think additional external / internal layers (examples like the “Coffee Percolator” dress or the “Flowering Lavatera – Petal” skirt).
These are the easiest projects to start with, because there’s no need to modify the basic pattern.
So you can just go ahead, choose the most convenient attaching mechanism described in later chapter (I generally choose scratch, buttons, hooks or magnets), and create your piece. For the removable parts, in most cases you won’t need to design a separate pattern, simply use the basic pattern as a base and slightly adjust as you like.
Intermediate -> Add / remove parts attached but not structurally critical to your project.
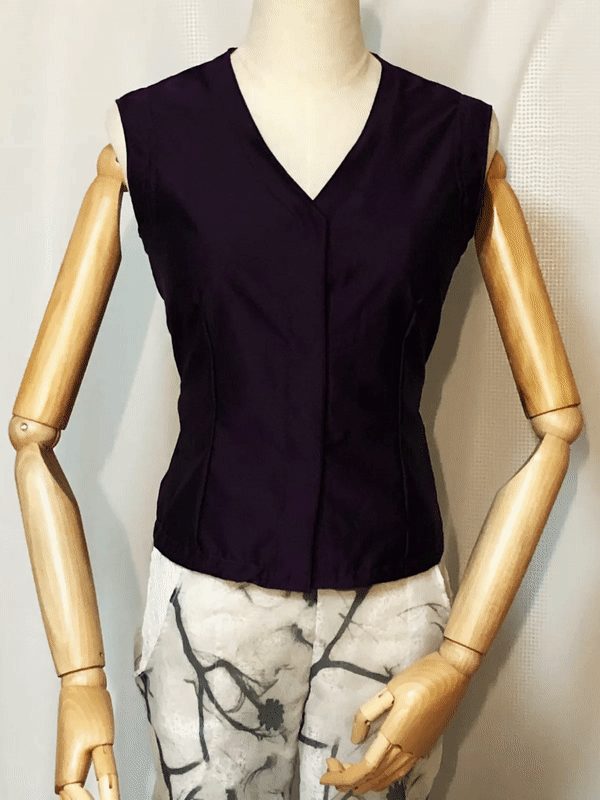
So even though your basic pattern will mostly remain untouched, you will need to modify the edges of your project. Think legs warmers buttoned to a sport shorts, removable sleeves (like the “Blouse variables” or the Henabees* sleeves) or hats.
So before moving on, you will need to choose the removing mechanism (I’ll discuss this later), and modify your pattern accordingly.
As a basic rule and for most mechanisms (zip aside), it means leaving additional space around the removable edges or overlapping parts parts of your project, so that you have enough space to insert the mechanism; and reinforcing these areas with fusible or stronger lining pieces so that the project won’t tear off.
Advanced -> Add / remove parts that are structurally critical for your project.
Here we are talking about removing core functional elements. Elements that are used to build and keep the project together, or that are used to cover sensitive areas (like products from Proud Fox* for example).
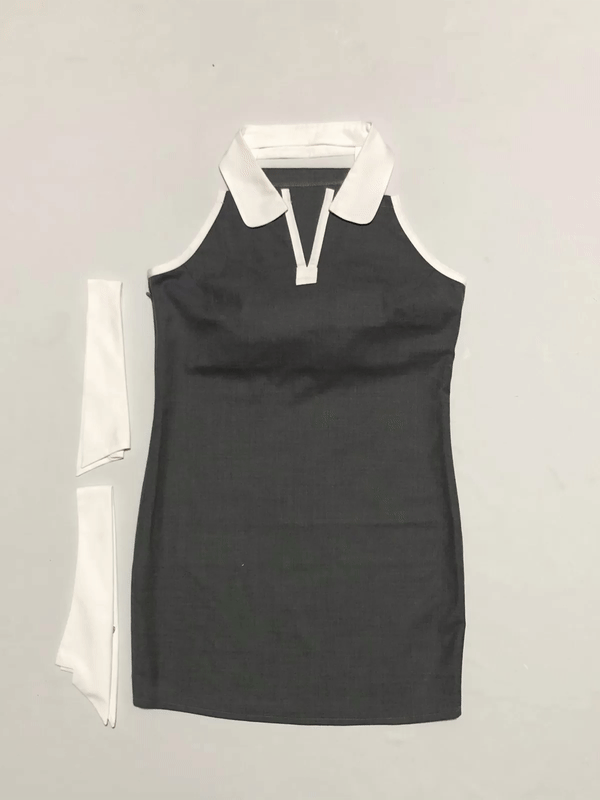
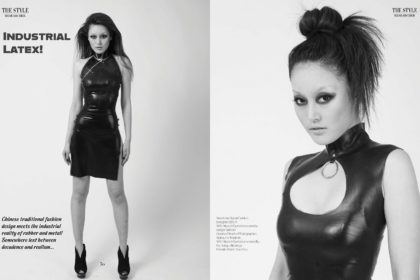
Think interchangeable bra compnents like Bra Lab* does, think removable pants crotch, think changeable bodice… For examples on the “Agile Collars“, the interchangeable collars are also here to hold the upper part of the dress.
These types of projects require to completely rethink and adapt the basic pattern. There’s very few standard rules here, so it really is about your creativity and ingenuity. But here are some key factors to consider:
Key factors to consider:
- Stress points. Removable are by definition not as strong as sewn parts. So choose and position mechanism that is secure enough to ensure that removable parts stay attached at all time. That’s unless the wearer decide to change. So it is generally better to opt for locking systems (zip or buckles for example) instead of weaker options such as buttons that can tear off with time.
- Tension lines and gaps. Unlike sewn parts, removable parts are not necessarily attached all the way. For example, if you use buttons, you will have several attach points that will carry the tensions, and gaps in between. To make sure these gaps behave like they ought to and do not change shape revealing too much of affecting the overall shape, I (a) generally position the removable sections in tension free sections, or in line with the tension line, (b) choose stronger mechanism in moving places like armholes or crotch for example and (c) increase the density of attach points in sensitive areas to minimize gaps. To sum up, don’t put a snap buttons section perpendicular to a tension line, unless you want it to snap off on its own… Figuring out tension lines and their behaviors, especially on articulated sections, can be daunting, so there’s a learning curve here.
- Comfort. A removing mechanism will likely be bulky and thick. So never forget the comfort of the wearer when you decide to create a removable piece. You can add lining or padding for comfort, but this will also add thickness to your design.
Optional -> Create a place to store the removable parts.
I’m just throwing this one in here. The fun part of interchangeable is to be able to change. So it means taking with you the different parts. Now the easiest solution is to leave it to the wearer to carry them in a bag, but you can also consider adding specific storing places in your design so that the project has it all.
It’s always a nice touch to add dedicated pockets somewhere, but this increase complexity, and will impact a lot of decisions (material flexibility, removable part size, number of options, or overall aesthetic just to name a few).
How to attach?
Choosing the right mechanism depends on your project’s needs. Ask yourself: Is your project attaching and removing…
- heavy, bulky and long parts?
- parts covering private areas?
- parts structurally critical or under stress?
=> Strong & Secure mechanisms
- parts you want, or need, to change quickly?
- parts you often change?
- parts easy to change?
=> Easy & Practical mechanisms
- parts fits seamlessly in the design?
- parts that looks invisible?
=> Aesthetic & Fashionable mechanisms
- parts around sensitive skin or hairy areas?
- parts likely to move a lot?
=> Comfortable & Flexible mechanisms
Once you get a clear idea on what you’re after, time to go through your options…
Available options:
Buttons:
Strong 2/3, Easy 2/3, Aesthetic 3/3, Comfortable 3/3.
Buttons are the easiest solution for simple designs. They look decorative on your basic project, and can be used to attach / detach additional parts. They are also very easy to use. However, even though they strongly keep removable parts attached, the thread can wear out with time, especially for parts under important stress or tensions, like parts moving a lot. The other drawback is that they will leave gaps, unless you put a lot of them, in which case they no longer are an easy solution. I personally only use the buttons method for simple design, and not for more complex projects.
Snap buttons:
Strong 1/3, Easy 3/3, Aesthetic 3/3, Comfortable 2/3.
Not as strong as buttons, slightly less comfortable too, and with the same gap issue. But snaps are just so practical and easy to use that it is a great solution for simple and even intermediate projects.
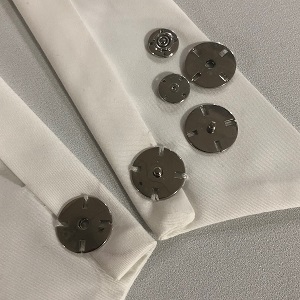
Magnetic systems:
Strong 1/3, Easy 3/3, Aesthetic 2/3, Comfortable 2/3.
Basically the same as snaps but with less choices of design and colors, however unlike snaps, you can hide magnets behind layers of fabric, making them completely invisible on the basic project. They are slightly less practical to integrate / sew inside a project, but really, really practical to use. So, I wouldn’t recommend for any intermediate or complex project, but it is a really nice solution for simple projects like the “Cloud” series.
Hooks:
Strong 3/3, Easy 2/3, Aesthetic 2/3, Comfortable 2/3.
When used along tension lines, hooks are very secure. However, what you gain in strength, you loose on ease of use. I mean, bras’ hooks are famous for being resistant yet not the easiest thing to remove. They can be very small too, making them easy to integrate and hide. The other benefits of hooks is that they can be very flexible too. Overall, they are a safe choice for complex projects (but beware tensions line), and for project with moving parts.
Scratch:
Strong 2/3, Easy 3/3, Aesthetic 1/3, Comfortable 2/3.
Probably the easiest there is. It is so easy to use for the wearer that it is the go-to solution for kids project. However, this comes with a price. It is generally unaesthetic when outside of the project, and uncomfortable inside. It is often not that strong either, unless you keep a large scratch area, in which case it becomes even less aesthetic or comfortable. So I personally dislike this method, even though it can be very good for simple project.
Zipper:
Strong 3/3, Easy 2/3, Aesthetic 2/3, Comfortable 2/3.
Probably the strongest method there is, and yet still pretty much easy to use. However zips require a lot of designing adjustments. Straight; uncomfortable / dangerous nearby sensitive or hairy areas; hard to hide; these are a few constraints. So unless you include the zip very early in your design and build around it, it is not easy to implement. So more a complex project system.
Others solutions:
Less common, you can also consider Rings / Buckles / Loops / Clamps / Eyelets / Cords. Most of them works best for intermediate or complex project. In any case, they are to be considered early in the designing process. A few pointers:
- Clamps are very, very easy to use
- Cords, rings, loops & eyelets are very, very strong and very flexible.
- Buckles are very strong, flexible, and easy, but not that aesthetic nor comfortable.

Magnet Magnets
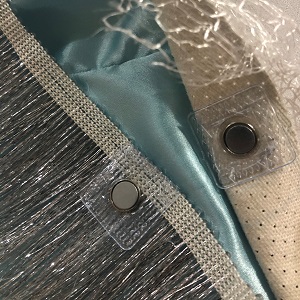
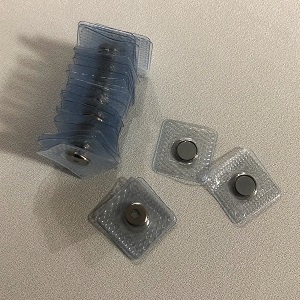
Before your final decision, always test the mechanism before you buy. Some magnetic solutions can be really strong, and some hooks can be very weak (too open). So test the strength by pulling apart in every direction.
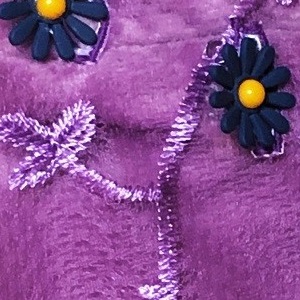
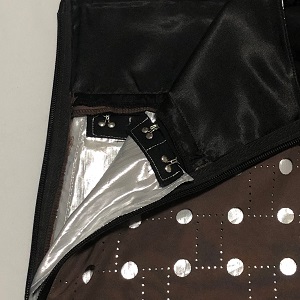
All set? A final trick of mine: for two parts mechanisms (snaps, hooks, magnets and so on) I always use them by a multiple of two, and alternate + / – so that I don’t end up with a pile of useless +. Not clear? look at the detail picture of the “Agile Collars“, each collar has 4 snaps, 2 + and 2 -, and the dress too, so that I can create an endless number of collar without wasting snaps.
So now that you have an idea or the aesthetic you’re after, and have decided on your design and removing mechanism, then…
What’s next?
Time do get down the drawing board and finalize your concept. Technicalities aside, it’s also time to decide on less structural options that are opened to you with removable and interchangeable designs, such as: how many alternatives to create!!! And that’s where the fun really begins…. There’s no right or wrong, and at this point it really is about your vision.
Q&A
I’d more than happy to help out or answer any specific queries or issues you might have with a removable or inter-changeable design if you have, either below here on the comments section, or by mail to eff@effycreations.com.
Pros & Cons
- Range from very easy to very complex designs
- Can create endless alternatives with few additional materials
- Advanced designs require complex material stress and tensions analysis
Gallery
-
 The Agile Collars Dress$128.00
 -
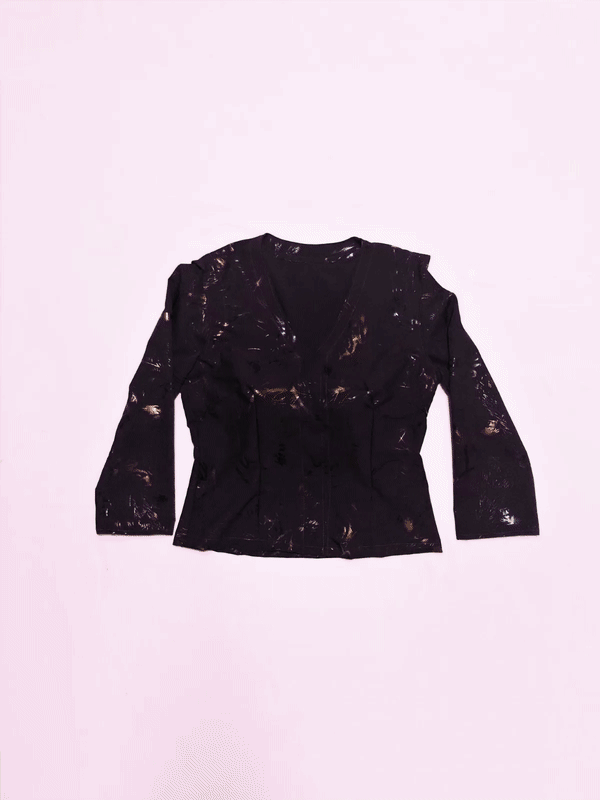
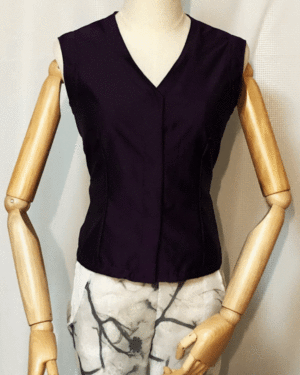
The Blouse Variables ~Black~$68.00
-
The Blouse Variables ~Blue~$68.00
-
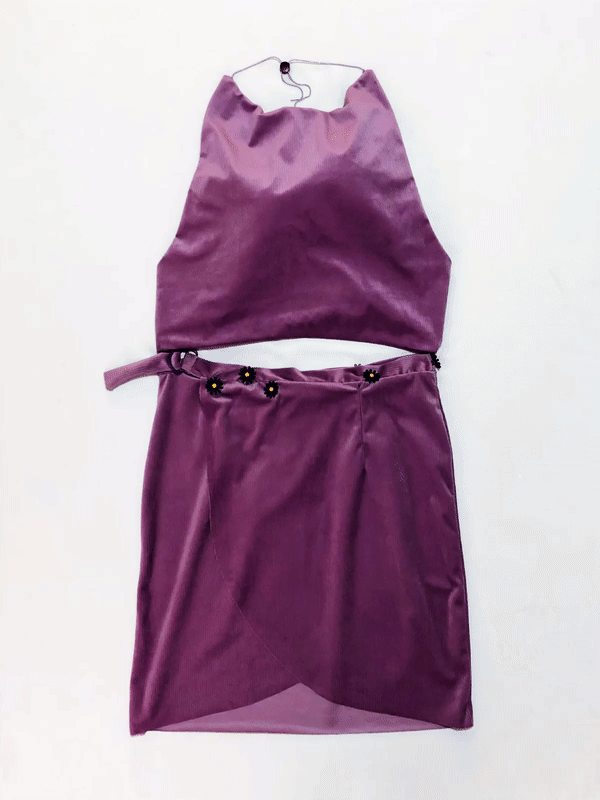
The Blouse Variables ~Purple~$68.00
-
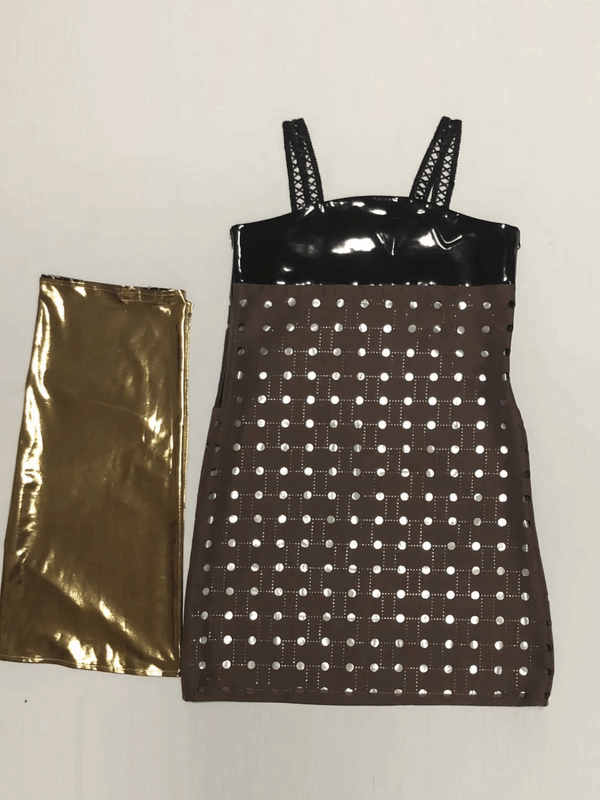
The Coffee FlavorsPrice range: $28.00 through $82.00
-
The Coffee Percolator DressPrice range: $98.00 through $163.00


And for more example other than Effy By Design‘s, you can also check other reversible’s brand listed on flexible fashion brand’s directory.


[…] Tags:eau news water 水 Previous PostRemovable, detachable & inter-changeable fashion – Keynotes on design &… […]